When your landlord refuses to return your security deposit or sends you an itemized list claiming ridiculous deductions, the difference between getting your money back and losing it comes down to one thing: proof. Not your memory of what happened, not your verbal agreement with the landlord, not your sense of what's fair—documented evidence that proves exactly what condition the apartment was in, what you paid, and what your landlord did wrong.
Most tenants lose deposit disputes not because they don't have valid claims, but because they can't prove them. Your landlord has photos they claim show damage. You have... nothing. Your landlord says you never paid the full deposit. You have... no receipt. Your landlord swears they sent an itemized list within 14 days. You have... no proof they didn't.
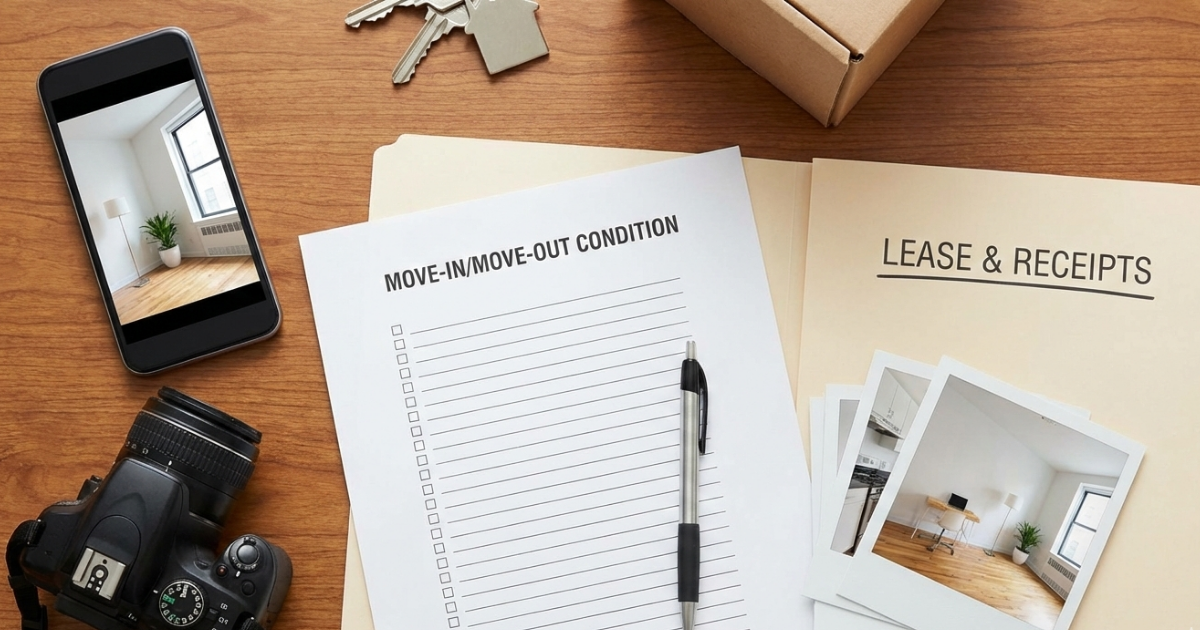
Here's exactly what evidence to collect from the day you move in through the day you sue for your deposit, organized so you know what to keep, when to gather it, and how to use it when your landlord tries to steal your money.
Before diving into specific documents, understand what you're building evidence to demonstrate:
First: You actually paid the security deposit. This sounds obvious, but landlords sometimes claim deposits were never paid in full or were smaller than you claim. Your proof of payment shuts down these arguments immediately.
Second: The apartment was in good condition when you left. Specifically, that any wear and tear was normal, that you didn't cause damage beyond ordinary use, and that pre-existing issues you documented at move-in still existed (or were repaired) at move-out. This defeats inflated damage claims.
Third: Your landlord violated deposit return procedures. Under New York General Obligations Law § 7-108, landlords must return deposits or provide itemized deductions within 14 days (for most residential tenancies) or 30 days (in some localities or lease types). Missing this deadline forfeits their right to keep any portion of the deposit. Proving they violated the timeline wins you the full deposit regardless of apartment condition.
Every piece of evidence you keep should support at least one of these three proof points.
These documents establish the basic facts of your tenancy and your deposit. Keep copies forever—not just during your tenancy, but for years after you move out in case disputes arise.
Your lease is the contract governing your tenancy and your deposit. Keep the complete lease including:
The main lease document showing: tenant and landlord names, property address, lease term dates, monthly rent amount, and critically, the security deposit amount stated in the lease.
All riders and addenda: Pet addendum showing you disclosed your pet and paid pet deposit, parking addendum if you had assigned parking, move-in condition checklist if your landlord provided one, house rules if attached to the lease, any amendments or modifications signed during your tenancy.
Why the lease matters: If your landlord later claims you owe a larger deposit than you paid, your lease states the required amount. If they claim you violated lease terms justifying deposit deductions, your lease shows what terms actually applied. If they claim certain rules prohibited things you did, the lease controls what rules were actually enforceable.
How to keep it: Digital and physical copies. Scan your entire lease to PDF and save to cloud storage with automatic backup. Also keep a physical copy in a safe place. Leases are often multiple pages stapled together—don't lose pages. You need the complete document.
If you lost your lease or never received a copy, request one from your landlord in writing before move-out: "Please provide a complete copy of my current lease including all riders and amendments." If they refuse, note that refusal in your records—judges don't look favorably on landlords who won't provide tenants with their own lease documents.
This is the single most important piece of evidence because everything else becomes irrelevant if you can't prove you paid a deposit in the first place.
Bank statements showing the check you wrote clearing your account, or the debit/withdrawal for the deposit amount on the date you paid.
Cancelled checks if you paid by personal check and your bank provides images of cancelled checks. These show the deposit amount, who you paid (landlord or management company), and the date it cleared.
Money order stubs or receipts if you paid by money order. The stub shows amount, date, and payee.
Venmo, Zelle, or other electronic payment screenshots showing the transfer amount, date, recipient name, and any description field noting "security deposit" or "deposit for [address]." Screenshot the transaction details page showing these elements, not just your main account screen.
Credit card statements if you paid deposit by credit card, showing the transaction amount, date, and merchant name.
Deposit receipts from landlord if your landlord actually provided one (many don't). A signed receipt is gold because the landlord can't later claim you didn't pay.
Email confirmations if payment was made online through a landlord portal. Forward these to a permanent email account and save PDFs.
If you paid cash (not recommended precisely because it creates no paper trail), any written receipt becomes critical. If you paid cash without getting a receipt, gather any evidence you can: bank withdrawal showing you withdrew that amount around that date, witnesses who were present when you paid, text or email from landlord acknowledging receipt of the payment.
Sometimes landlords make statements—in texts, emails, or casual letters—that become important evidence later:
Promises to return the deposit: "Don't worry, you'll definitely get your full deposit back as long as you clean up." Screenshot and save this. If they later claim damage, their promise undermines their credibility.
Acknowledgment of normal wear and tear: "Some paint touch-up is expected, that's normal wear." This admission prevents them from later charging you for paint.
Statements about condition: "The apartment looks great, no issues I can see." Emailed after a mid-tenancy inspection or move-out walkthrough, this contradicts later damage claims.
Deposit amount confirmations: "Your $2,400 security deposit is being held in [bank name] as required." This locks in the deposit amount and bank information.
Agreements about what you're responsible for: "You don't need to repaint when you leave, we handle that between tenants." This prevents repainting charges.
These statements might seem casual when made, but they're admissions that benefit you later. Save every email, text, or letter from your landlord. Set up a dedicated folder in your email for landlord communications. Screenshot texts and back them up to cloud storage.
Landlords can deduct unpaid rent from security deposits. Proving you were paid up through your move-out date eliminates this deduction category entirely.
Rent receipts for every month of your tenancy, but especially the final 3-6 months. If your landlord provided receipts, keep them. If they didn't, your bank records serve as receipts.
Bank statements showing rent payments clearing through your move-out month. Highlight or annotate these payments so they're easy to identify.
Cancelled checks if you paid by check, showing rent payments including the final month's rent.
Online payment portal screenshots showing transaction history with all rent payments marked "paid" or "completed" through your final month.
Ledger from landlord if you requested your rent account history (which you should, before move-out). A ledger from the landlord showing $0 balance through move-out is powerful evidence.
If there's any dispute about whether you paid final month's rent or whether your last payment covered everything through move-out, having month-by-month payment proof shuts it down immediately.
The condition of the apartment when you moved in matters enormously because it establishes what damage existed before you arrived. Your landlord cannot charge you for damage that predated your tenancy.
The day you get keys—before you move any furniture in—walk through the entire apartment with your phone camera:
Photograph every room from multiple angles. Don't just take one photo per room. Take 3-5 photos showing different perspectives: standing in doorway looking in, standing in corners looking across, close-ups of specific areas.
Document all pre-existing damage. Scratches on walls, chips in tile, stains on carpet, scuffs on doors, worn areas on flooring, broken blinds, missing fixtures, chipped paint, marks on walls, everything. If it existed when you moved in, photograph it close-up with context showing what room/area.
Photograph major systems and appliances. Stove, refrigerator, dishwasher, HVAC vents, windows, bathroom fixtures, light fixtures. These establish baseline condition and prove you're not responsible if they're damaged or malfunctioning at move-out.
Take videos. Walk through each room slowly while recording video, narrating what you see: "This is the bedroom, you can see there's already a stain on the carpet here near the closet, and there are several nail holes in the walls that were already here."
Use timestamp features. Modern phones embed date/time metadata in photo and video files. Alternatively, use apps that display visible timestamps on photos. This proves the images are from move-in, not staged later.
Save originals with metadata intact. Don't edit or crop photos in ways that strip metadata. Save original files to cloud storage preserving their original date/time information.
Why this matters: When your landlord tries to charge you $500 for carpet stains at move-out, your move-in photos showing those same stains already existed defeat the charge completely. They can't deduct for damage you didn't cause.
Some landlords provide move-in condition forms or checklists where you note existing damage. Fill these out thoroughly:
List every defect, no matter how minor. "Small nail holes in bedroom wall near window," "Kitchen cabinet door doesn't close properly," "Bathroom tile grout cracked near tub," "Carpet worn in traffic path from door to kitchen." Be specific and complete.
Take photos of the completed form. After filling it out, photograph or scan the entire form before submitting it to your landlord. This prevents later disputes about what you wrote or whether you submitted it.
Request landlord signature acknowledging receipt. Ask your landlord to sign a copy acknowledging they received your move-in condition report. Many won't, but if they do, it's powerful evidence they knew about pre-existing issues.
Send it certified mail if landlord won't sign. If your landlord refuses to acknowledge receipt, mail your completed condition form to them via certified mail with return receipt. The return receipt proves they received your documentation of pre-existing damage.
If your landlord didn't provide a move-in form, create your own. Type up a list of all damage and issues you photographed, organized by room. Email it to your landlord: "Attached is my move-in condition report documenting pre-existing damage to the apartment as of [move-in date]. Please acknowledge receipt." Even if they don't respond, your email creates a date-stamped record.
If friends or family helped you move in and saw the apartment's condition, get their contact information and consider having them write brief statements:
"I helped [your name] move into [address] on [date]. When we arrived, I observed [describe damage or conditions]. The carpet had visible stains near the living room window, there were multiple holes in the bedroom walls, and the bathroom tiles were already cracked."
Signed, dated witness statements strengthen your case, especially if you end up in court and can bring witnesses to testify.
The inverse of move-in documentation—proving the apartment was clean and undamaged (or no more damaged than move-in condition) when you left.
After you've removed all belongings, cleaned thoroughly, and completed all move-out tasks, document everything:
Empty apartment photos from every angle. Show rooms completely empty with nothing left behind. This proves you removed all property and didn't abandon anything.
Close-ups showing clean condition. Photograph clean counters, sinks, tubs, toilets, floors, appliances. Show that surfaces are clean and free of dirt or grime.
Photos of any pre-existing damage still present. If that carpet stain from move-in is still there (because it's not your responsibility), photograph it again at move-out. Comparison of move-in and move-out photos showing the same stain proves you didn't cause new damage.
Evidence of repairs you made. If you spackled nail holes, touch-painted scuffs, replaced broken fixtures, or fixed anything you were responsible for, photograph the repairs showing completed work.
Walk-through video. Same as move-in—walk slowly through the entire apartment recording video and narrating: "This is move-out day, [date]. The apartment is completely empty and cleaned. Here's the living room, floor is swept and mopped, walls are clean, no damage beyond the pre-existing issues documented at move-in."
Light fixtures, smoke detectors, and fixtures in place. Photograph that all fixtures that came with the apartment are still there and functional. Your landlord can't claim you removed items that were there at move-in.
Timestamp everything. Make sure your phone's date/time is set correctly so metadata shows these photos/videos are from move-out date, not months earlier.
The more comprehensive your move-out documentation, the harder it is for your landlord to claim damage you didn't cause. When they say "tenant left carpet stained," you show move-in and move-out photos proving the stain existed the entire time.
If your landlord conducts a move-out inspection with you present (or if you requested one and they provided it), document everything about that inspection:
Request the inspection in writing beforehand. At least 2-3 weeks before move-out, send written request: "I request a pre-move-out inspection as allowed under New York security deposit law. Please let me know what date and time works for you." This documents you exercised your right.
Bring a witness to the inspection. Have a friend or family member present to witness what's said and what's inspected.
Take notes during the inspection. Write down everything the landlord or their representative says: "Landlord said 'everything looks fine,'" "Landlord noted small nail holes but said they were normal," "Landlord didn't identify any issues requiring charges."
Record the inspection (if legal in your state). New York is a one-party consent state for recording, meaning you can record conversations you're part of without the other person's consent. Consider audio or video recording the move-out inspection. Capturing your landlord saying "looks good, no problems" defeats later damage claims.
Request written confirmation of condition. Ask your landlord to sign a move-out inspection form confirming condition. Many use standard forms with checkboxes for various items and spaces for notes. If they complete a form, photograph or scan it immediately.
Email summary after inspection. After the inspection, email your landlord: "Thank you for conducting the move-out inspection on [date]. As discussed, you noted [list what they said], and you did not identify any damage beyond normal wear and tear. I expect return of my full $[amount] security deposit within 14 days per New York law." This creates a written record of what happened, and their failure to correct your summary can be used as agreement.
If your landlord refuses to do an inspection or doesn't show up when scheduled, document that: "I requested a move-out inspection on [date]. Landlord did not appear and did not respond to my request. I completed move-out on [date] with the apartment in clean condition as documented in attached photos."
Friends who helped you move out, professional cleaners you hired, the super if they saw the apartment—anyone who witnessed the apartment's condition at move-out can provide supporting evidence.
Get full names and contact information of anyone who saw the apartment after you cleaned and emptied it. You may need them to testify or provide written statements.
Request brief written statements: "I helped [your name] complete move-out of [address] on [date]. The apartment was completely clean, all trash and belongings were removed, and I did not observe any damage beyond normal wear and tear. The carpet, walls, appliances, and fixtures were all in good condition."
These statements don't need to be notarized or formal—a simple signed statement with date is sufficient for small claims court or deposit disputes.
If you paid for repairs, professional cleaning, or improvements at your landlord's request (or to remedy damage you caused), those receipts reduce or eliminate damage claims.
Professional cleaning invoices: If you hired professional cleaners for move-out (which many leases require or strongly suggest), keep the invoice. When your landlord claims $300 cleaning fee, you show professional cleaning receipt proving the place was cleaned.
Repair receipts: Did you fix a broken cabinet hinge? Replace a cracked light cover? Repair a damaged tile? Keep receipts for materials and labor. These prove you already remedied damage and shouldn't be charged again.
Improvement receipts: If you installed something at landlord's request and were told "just leave it, we'll credit your deposit," keep documentation of that agreement and what you spent. This prevents landlord from later claiming you made unauthorized alterations.
Supplies purchased: Receipts for spackle, paint, cleaning supplies, replacement hardware—anything you bought to prepare the apartment for move-out. These show you invested in returning the apartment to good condition.
Pair receipts with communications about the work:
Emails or texts requesting repairs: "I noticed the cabinet door is broken. Should I repair it and deduct from rent, or will you send someone?" Followed by "Okay, I fixed it, receipt attached."
Landlord authorizing work: "Yes, please go ahead and paint over those scuffs, just use white to match." This authorization prevents later claims you made unauthorized changes.
Landlord requesting you handle something: "Can you clean the oven really well before move-out?" Your response: "I hired professional cleaners, invoice attached." This proves you fulfilled their request.
These communications plus receipts create an unassailable record that you addressed issues properly and shouldn't face deductions for them.
Every interaction with your landlord about your deposit, move-out, or apartment condition becomes evidence. Save everything.
Written notice of move-out: Your letter, email, or text telling landlord you're moving out on [date]. This establishes your intended move-out date.
Keys return confirmation: Receipt or acknowledgment showing when you returned keys. This is critical because the 14-day deposit return clock starts when you surrender possession (vacate and return keys).
If landlord won't sign a key return receipt, send keys via certified mail with return receipt requested. The signature on the return receipt plus certified mail tracking proves exactly when keys were delivered.
Alternatively, text or email immediately after returning keys in person: "I returned all keys to [location/person] today at [time]. Please confirm receipt." Their confirmation or even their silence after your message creates a record.
Notice of where deposit is held: Landlords in buildings with 6+ units must provide written notice of the bank name and address where your deposit is held. Keep this notice. It proves the deposit amount, where it should be, and that landlord was aware of their legal obligations.
Annual interest statements: If your landlord provided annual statements of accrued interest on your deposit, keep these. They confirm ongoing acknowledgment of the deposit amount.
Any communications mentioning deposit amount: Texts, emails, letters referencing your $2,400 deposit or whatever the amount is. These prevent later disputes about how much was deposited.
The itemized deduction list: If your landlord sends an itemized list of deductions (which they're required to provide within 14 days if they're keeping any portion of the deposit), keep the original and make copies.
Repair receipts or estimates they attach: Landlords are supposed to support deductions with actual costs. If they attach invoices or estimates, keep these. You'll need them to challenge inflated costs.
Correspondence about damage claims: Any email, text, or letter where landlord claims damage, requests payment, or explains deductions. "You left the carpet stained so we had to replace it, $1,500" becomes evidence you use to challenge whether replacement was necessary versus cleaning, and whether $1,500 is reasonable.
Promises: "You'll get your deposit back within the week" or "Your deposit will be mailed Monday." These create enforceable expectations and prove landlord acknowledged owing the deposit.
Refusals: "I'm not returning your deposit because you left damage" or "I'm keeping the deposit for cleaning." These admissions that they're withholding (combined with proof they missed the 14-day deadline) strengthen your case for statutory penalties.
Changing stories: If landlord first says one reason for keeping deposit, then later claims different reasons, keep all versions. The inconsistency hurts their credibility. "First you said cleaning, now you say carpet damage—which is it?"
This is critical for proving timing violations:
Keep envelopes: If your landlord mails you an itemized deduction list, keep the entire envelope with postmark. The postmark shows when it was mailed. If mailed on day 20 after move-out, they missed the 14-day deadline.
Save email headers: If landlord emails deduction information, save the complete email including headers showing send date and time. Email headers are harder to fake than just body text.
Screenshot messages with timestamps: If communicating via text or messaging apps, screenshot conversations with timestamps visible. This proves when communications occurred.
The timing of when your landlord sent (or didn't send) itemized deductions determines whether they forfeited their right to keep any deposit. Proof of timing is often the difference between winning and losing your case.
If your landlord was required to hold your deposit in a separate interest-bearing account (required for buildings with 6+ units in New York), documentation of compliance becomes powerful evidence.
Written notice of bank: Landlords must provide written notice within reasonable time (often interpreted as 30 days) of where deposit is held. This notice should include:
Keep this notice. Its absence proves landlord violated deposit handling requirements, which can result in penalties including double the deposit.
If your landlord provided annual statements showing interest earned on your deposit, keep every statement. These prove:
If you discover evidence your landlord mixed your deposit with their operating funds instead of keeping it in a separate account, that evidence is gold:
Landlord admissions: "I needed to use the deposit money to cover building expenses temporarily" or "The deposit is in my general business account." Screenshot or save these admissions.
Bank statements (if you somehow obtain them): Unlikely you'd get these, but if you do through discovery in litigation, they can prove deposits weren't held separately.
Landlord inability to account for deposit: If landlord can't explain where deposit is held or claims they "don't remember" or "don't have records," that suggests improper handling.
Commingling deposits with operating funds violates the statutory requirement to hold deposits in trust. This violation can result in forfeiture of deduction rights and penalties.
When you're preparing to sue in small claims court or file a complaint with the New York Attorney General's office, organization of your evidence matters enormously.
Prepare a single-page or two-page timeline showing key dates:
Move-in date: [Date] Security deposit paid: [Date] - [Amount] - [Payment method] Bank where deposit held: [Bank name per landlord notice] Move-out date: [Date] Keys returned: [Date] - [How confirmed] 14-day deadline for deposit return: [Calculated date] Itemized list received (if any): [Date] - [How received] Days late (if missed deadline): [Number] Demand letter sent: [Date] Small claims filed: [Date]
This timeline gives the judge or AG investigator an immediate overview of your case and highlights the key fact: your landlord missed the deadline.
Create labeled folders (physical or digital):
Folder 1: Lease and Deposit Payment Proof
Folder 2: Move-In Condition
Folder 3: Move-Out Condition
Folder 4: Landlord Communications
Folder 5: Deductions and Disputes
When filing small claims, prepare a packet for the judge:
Cover page: Your name, case number, brief summary ("Landlord failed to return security deposit within 14 days as required by GOL § 7-108")
Exhibit A: Lease
Exhibit B: Proof of deposit payment
Exhibit C: Move-in photos showing pre-existing damage
Exhibit D: Move-out photos showing clean, undamaged condition
Exhibit E: Timeline document
Exhibit F: Key communications (demand letter, landlord's itemized list or lack thereof, etc.)
Exhibit G: Proof of 14-day deadline violation (envelope postmark, email dated after deadline, or proof no communication was received)
Make three copies: one for the judge, one for your landlord (you'll need to provide them a copy), one for yourself to reference during the hearing.
Label everything clearly. Use tabs or dividers. Make it easy for the judge to find specific evidence when you reference it.
Prepare a 1-2 paragraph written summary you can hand to the judge explaining your case:
"I rented [address] from [date] to [date]. I paid a $2,400 security deposit on [date] as shown in Exhibit B. I vacated on [date] and returned all keys on [date] as shown in Exhibit E. Under GOL § 7-108, defendant had 14 days to return my deposit or provide an itemized deduction list. Defendant failed to do either. It has now been [number] days since move-out with no deposit return and no itemized list. Defendant therefore forfeited the right to retain any portion of my deposit. Additionally, Exhibits C and D show the apartment was in clean condition at move-out, and any alleged damage was pre-existing per move-in photos. I seek return of the full $2,400 deposit plus statutory penalties for bad faith retention."
This summary gives the judge your entire case at a glance. They can review your exhibits while following your summary, and they'll understand your argument immediately.
Judges in small claims court see hundreds of security deposit cases. Most involve tenants who show up with no evidence except their word against the landlord's word. These tenants lose even when they're right because they can't prove anything.
When you show up with organized exhibits, a clear timeline, comprehensive photos, and documentation of every claim you make, you stand out immediately. The judge can see you're credible, prepared, and likely telling the truth because you have proof of everything.
Your landlord will probably show up with minimal evidence—maybe some photos they claim show damage (which you'll counter with your move-in photos showing the same damage), maybe estimates for repairs (which you'll challenge as inflated), maybe a vague timeline (which you'll contradict with precise dates and postmarks).
The party with better evidence almost always wins. Not because judges favor tenants or landlords, but because judges can only rule based on what's proven. Your comprehensive evidence package proves your case while your landlord's weak evidence falls apart under scrutiny.
Beyond winning, strong evidence creates settlement leverage. When your landlord's lawyer sees your evidence file before the hearing, they often convince the landlord to settle rather than lose in court. Landlords who realize you can prove they missed the 14-day deadline—which means automatic forfeiture of all deductions—suddenly become willing to return deposits they were planning to keep.
Evidence isn't just for court. It's for every stage of the dispute: your demand letter references specific evidence, your complaint to the AG includes documented violations, your settlement negotiations leverage documented facts.
If you're currently renting and plan to move out eventually, start building your evidence file now:
Today: Take comprehensive photos of your apartment's current condition. Create a folder on your computer labeled "Apartment - [Address] - Evidence."
This week: Locate your lease and deposit payment proof. Scan these documents and save to the evidence folder. Make physical copies and store in a safe place.
This month: Start saving all communications with your landlord to the evidence folder. Set up email filters that automatically file landlord emails. Export important text conversations to PDF.
Before move-out: Review this article's checklist and ensure you have all categories of evidence. Take comprehensive move-out photos. Request the move-out inspection in writing.
After move-out: Keep everything organized and accessible. Don't assume you'll remember details months later when your landlord finally sends (or doesn't send) deduction information.
Documentation is free. It costs you nothing but a few minutes to photograph your apartment, save communications, and organize receipts. But it can be worth thousands of dollars—the difference between losing your entire deposit and getting it back plus penalties.
Your landlord is counting on you not having evidence. Prove them wrong.